

How to Securely Expose Your Local Lab Using Cloudflare Tunnel and Docker

In the world of Cloud Engineering, security is not an afterthought; it’s a foundation. When hosting a portfolio or a home lab, the old-school method of Port Forwarding is a major security risk. It exposes your home IP and leaves your network vulnerable.
Today, we are taking a Zero Trust approach. We will use Cloudflare Tunnel (cloudflared) and Docker Compose to create a secure bridge that allows the world to see your work without ever opening a port on your router.
The Architecture
Before we dive into the terminal, let's look at the flow of traffic:
User requests domain
example.com.Cloudflare Edge receives the request.
Cloudflared Connector (running in your Docker or server) pulls the request through an outbound-only encrypted tunnel.
Webserver serves the static files locally.
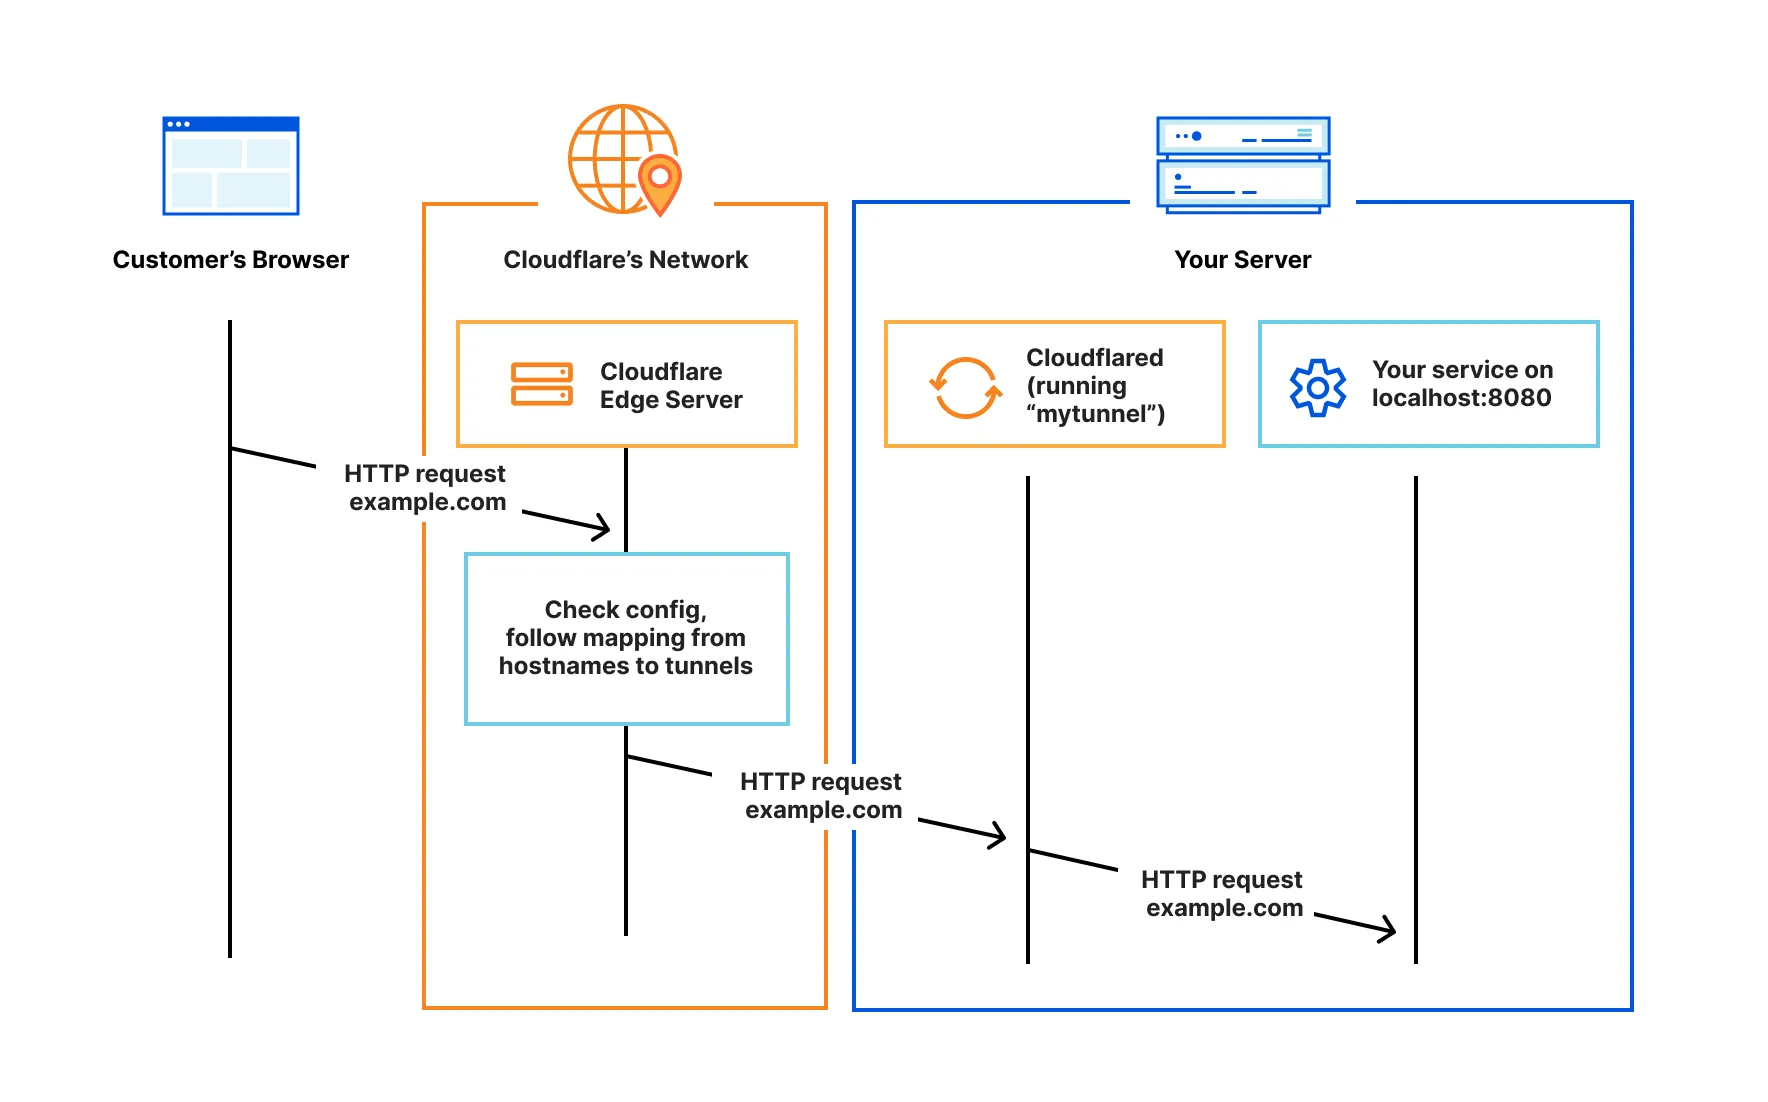
URL: https://developers.cloudflare.com/cloudflare-one/networks/connectors/cloudflare-tunnel/
Prerequisites for our project:
Domain: Managed by Cloudflare (e.g.,
up2runc.com).Environment: Docker & Docker Compose installed.
Access: Cloudflare Zero Trust dashboard (Free Tier).
Step 1: Initialize the Cloudflare Tunnel
We need to create the tunnel identity in the Cloudflare Cloud.
Navigate to the Zero Trust Dashboard > Networks > Connectors
Click Create a Tunnel > Cloudflared > Select Cloudflared

Name it (e.g
website-prod)Save Tunnel
Choose Docker provider:

Important: Never share your token!!
Step 2: Provisioning with Docker Compose
We will define our infrastructure as code. This ensures our setup is reproducible.
File: docker-compose.yml
YAML FILE
version: '3.8'
services:
  # Service 1: The Alpine Linux
  web:
    image: nginx:alpine
    container_name: web-server
    restart: unless-stopped
    volumes:
      - .:/usr/share/nginx/html:ro

  # Service 2: The Tunnel Connector
  tunnel:
    image: cloudflare/cloudflared:latest
    container_name: cloudflare-connector
    restart: unless-stopped
    command: tunnel --no-autoupdate run --token ${TUNNEL_TOKEN}
    depends_on:
      - web
Step 3: Configure Public Hostnames
Go back to your Cloudflare Tunnel settings and click the Public Hostname tab.
Public Hostname:
up2runc.comService:
http://web:80

Note: We use
web:80because Docker Compose creates an internal network where the services can talk to each other by name.
Step 4: Deployment & Verification
Execute the deployment:
Bash
export TUNNEL_TOKEN=your_token_here
docker-compose up -d


Verification Checklist:
Status: Check the tunnel status in the dashboard; it should show HEALTHY.
Connectivity: Run
curl -Ihttps://up2runc.comand look for theServer: cloudflareheader.Security: Confirm your router has NO ports forwarded to your machine.
Key Takeaways
Outbound Only: The tunnel only makes outbound connections. This means your firewall stays closed.
Identity-Aware: You can now add Cloudflare Access to require a login before anyone even sees your site.
Static Content: Nginx Alpine is the excelent standard for lightweight, high-performance static hosting.
Conclusion
And just like that—simple and efficient—we’ve implemented a robust, Cloudflare-protected solution. We’ve moved from a 'Home Hobbyist' setup to a Professional Zero Trust Architecture, proving that high-level security doesn't have to be over-complicated.
By eliminating the public attack surface and leveraging Docker's immutability, up2runc.com is now production-ready.
Are you ready for the next project?
About the author
Cloud Specialist with expertise in SRE, infrastructure, and security. Certified in CKA, LPIC-3 (Security), and AZ-104 My focus rests on three pillars: Cloud Architecture, Security, and Containerization, currently integrating AI to drive operational efficiency.
Comments
Join the discussionNo comments yet. Be the first to comment.


